Pub/Sub flask monitor app user view
Publish/subscribe messaging, or pub/sub messaging, is an asynchronous messaging service. It is often used in service-to-service communication in serverless and microservices architectures. Cloud Pub/Sub is such a service, built on a core Google infrastructure component that many Google products (Ads, Search, Gmail) have relied upon. You can learn more about Pub/Sub key consepts here and here.
Pub/Sub may be used in a GCP project in relation to other APIs to communicate status, data and other API-specific information, for scheduled or unscheduled operations. Messages can be accessed using the Console, the gcloud command-line tool, or using client libraries. We will be using the Python Google Cloud client libraries to build a Flask application that can asynchronously listen for new messages on a Cloud Pub/Sub Subscription, store them in a database and serve views on a client-side browser. The application is a proof-of-concept work, with the intention of demonstrating combined use of these techs to enable increased usability and monitoring of Cloud APIs and processes in your Cloud projects.
According to one’s needs and resources the application could be scaled to handle numerous publish/subscribe asynchronous tasks, advanced ui monitoring tools and metrics, user event-based notifications, triggering of other tasks, etc. For the purpose of this demo app we are deploying using the free-tier on Heroku platform, which offers one web dyno and one worker dyno, around which the application has been adjusted to work with the available free resources. Adding more workers allows for task-queues with more asynchronous tasks, and thus increasing the ability to process event messages from multiple subscriptions, or even simultaneous publishing of messages to subscriptions.
The sources for this demo-app are available on the GitHub repo pubsub-monitor.
What the app does
The application can listen for new messages on a subscription created in a GCP project. When a new message is received it is stored in the database as a JSON string and also displayed in the current user’s view (client side). Bootstrap (Flask-Bootstrap), JavaScript, JQuery and plugins (Infinite-Scroll) have been used on the client-side to make the user experience more interesting. On the server-side, SQLite has been used for local development, while PostgreSQL and Gunicorn for Heroku deployment. RQ was chosen instead of Celery as a lighter solution, but one could similarly use Celery instead of RQ. There is also another task-queue, psq, which is a Cloud Pub/Sub Task Queue for Python, developed by Google for this purpose. This is not an official product and is still in development, so RQ was chosen instead of psq, as the latter does not work on Heroku platform.
How to use the source files
Requirements:
- pipenv
- SQLite
- A working GCP project, setup with Pub/Sub API
To run the app locally you will need to have a Python development environment setup containing all libraries required for the app to work, and you must also have SQLite installed. The Python virtualenv for this project is created and managed using pipenv, which also adds/removes packages from your Pipfile as you install/uninstall packages and generates the Pipfile.lock (used to produce deterministic builds). You will need pipenv to be able to quickly and reliably reproduce a working environment to run the app locally. If you are unfamiliar with pipenv have a look at a few quick tips to get you started. You also need to have a working GCP project, setup with Pub/Sub API, and a service account to get your GOOGLE_APPLICATION_CREDENTIALS key file. You then need to create a topic and a subscription.
Once you are set-up with the requirements, clone the repo, cd in the project’s root directory (e.g. gcpubsub) then create virtualenv and install dependencies:
git clone https://github.com/chrisliatas/pubsub-monitor.git gcpubsub
cd gcpubsub
pipenv install
This will install all project dependencies. Please note that the project is built using Python 3.7. When installing all of requirements is finished you will have a new virtualenv for the application that you can work-on by running:
pipenv shell
You will need to have your new virtualenv activated. You then have to:
export FLASK_APP=gcpubsub.py
export GOOGLE_APPLICATION_CREDENTIALS=path_to_key_file.json
export GCP_PROJECT_ID=your_GCP_project_name
export PUBSUB_TOPIC=your_pubsub_topic_name
export SUBSCRIPTION_NAME=your_subscription_name
Start a separate terminal in the same directory, activate your virtualenv (pipenv shell) and run:
rq worker gcpubsub-tasks

# You will get an output similar to:
09:16:13 RQ worker 'rq:worker:host-01.30454' started, version 0.12.0
09:16:13 *** Listening on gcpubsub-tasks...
09:16:13 Cleaning registries for queue: gcpubsub-tasks
On your first terminal run:
flask deploy
flask run
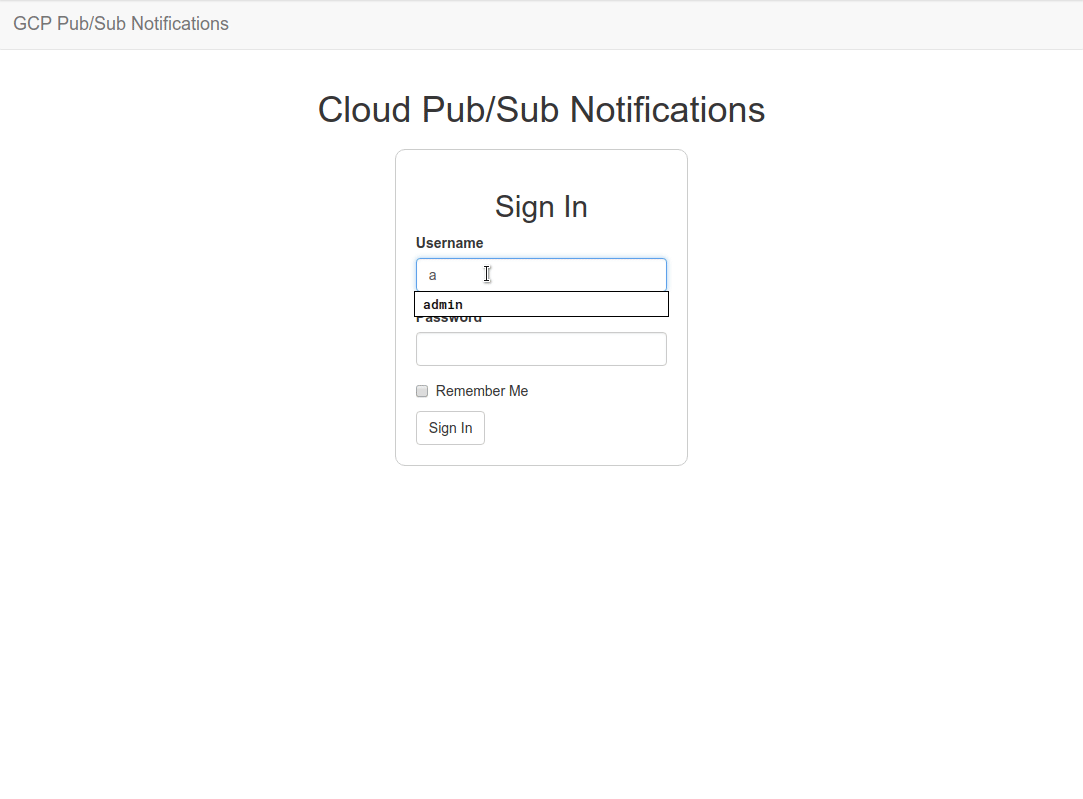
You should be able now, to view the application at http://localhost:5000. The application has a default user admin with password cannotguess, created by flask deploy command, that you can use for your initial login. You only need to run flask deploy for your first run. The default password can be changed after you login, from within the web interface.
Clicking on Start polling will initiate the background task that listens for messages in your subscription. If you have any messages, these will be loaded and displayed as soon as they are received. You can use the publish.py under the directory helpers if you need to create and publish sample messages to test the app.
Heroku deployment
Requirements:
- Heroku account
- Heroku CLI
Deploying on Heroku requires to have an account. You will also need to install Heroku CLI and login. You may then follow two approaches. You may either fork my repo on GitHub and use the Heroku’s integration with GitHub, or, assuming you have cloned the sources locally, create a new Heroku app and push the code from your local machine. I will further expand on the second approach, however most steps (except from adding sources to your Heroku app) apply to the first approach as well. To create a new Heroku app, from the local project’s root directory (gcpubsub if you followed my git clone example):
heroku create [unique-name-of-your-app]
# You will get an output similar to:
Creating ⬢ unique-name-of-your-app... !
Creating ⬢ unique-name-of-your-app... done
https://unique-name-of-your-app.herokuapp.com/ | https://git.heroku.com/unique-name-of-your-app.git
Your local repo should now have an extra remote, heroku, for fetch and push:
git remote -v
# Output similar to:
heroku	https://git.heroku.com/unique-name-of-your-app.git (fetch)
heroku	https://git.heroku.com/unique-name-of-your-app.git (push)
# You may have other remotes as well
We also need to create a PostgreSQL database on Heroku, to work with, as we cannot use SQLite. To enable the service:
heroku addons:add heroku-postgresql:hobby-dev
# Output similar to:
Creating heroku-postgresql:hobby-dev on ⬢ unique-name-of-your-app... free
Database has been created and is available
 ! This database is empty. If upgrading, you can transfer
 ! data from another database with pg:copy
Created postgresql-flexible-XXXXX as DATABASE_URL
Use heroku addons:docs heroku-postgresql to view documentation
To have RQ working on Heroku we must also enable the Redis service for our application:
heroku addons:create heroku-redis:hobby-dev
# Output similar to:
Creating heroku-redis:hobby-dev on ⬢ unique-name-of-your-app... free
Your add-on should be available in a few minutes.
! WARNING: Data stored in hobby plans on Heroku Redis are not persisted.
redis-convex-XXXXX is being created in the background. The app will restart when complete...
Use heroku addons:info redis-convex-XXXXX to check creation progress
Use heroku addons:docs heroku-redis to view documentation
Note: When running the above command you might get an output, prompting you to enter your credit-card, similar to the following:
Creating heroku-redis:hobby-dev on ⬢ unique-name-of-your-app... !
 ▸    Please verify your account to install this add-on plan (please enter a credit card) For more
 ▸    information, see https://devcenter.heroku.com/categories/billing Verify now at
 ▸    https://heroku.com/verify
This means that you have to verify your account to proceed, enabling the addon. Heroku’s verification process involves entering your credit-card, so billing may be enabled if you use services other than the free ones. However, if you would like to proceed you won’t have charges incurred with the redis service enabled for this app, as long as we are in the free-tier.
Similarly to local development, some environmental variables must also be added to Heroku app’s environment:
heroku config:set LOG_TO_STDOUT=1
# Output similar to:
Setting LOG_TO_STDOUT and restarting ⬢ unique-name-of-your-app... done, v6
LOG_TO_STDOUT: 1

heroku config:set FLASK_APP=gcpubsub.py
# Output similar to:
Setting FLASK_APP and restarting ⬢ unique-name-of-your-app... done, v7
FLASK_APP: gcpubsub.py

heroku config:set GCP_PROJECT_ID=[your_GCP_project_name]
# Output similar to:
Setting GCP_PROJECT_ID and restarting ⬢ unique-name-of-your-app... done, v11
GCP_PROJECT_ID: your_GCP_project_name

heroku config:set PUBSUB_TOPIC=your_pubsub_topic_name
# Output similar to:
Setting PUBSUB_TOPIC and restarting ⬢ unique-name-of-your-app... done, v12
PUBSUB_TOPIC: your_pubsub_topic_name

heroku config:set SUBSCRIPTION_NAME=your_subscription_name
# Output similar to:
Setting SUBSCRIPTION_NAME and restarting ⬢ unique-name-of-your-app... done, v13
SUBSCRIPTION_NAME: your_subscription_name
To further explain the above, LOG_TO_STDOUT=1 will redirect our application’s logs to stdout, as expected by Heroku platform. FLASK_APP sets the flask application, while the rest of the variables are related to your specific GCP project.
Next we have to add our GOOGLE_APPLICATION_CREDENTIALS keyfile from our authorized service account. If you have not done already, you need to obtain service account credentials to authorize your app on your GCP project. When creating the service account for your app, the role required to authorize our app’s tasks is roles/pubsub.subscriber, which must be chosen from the Role drop-down list, select Project > pubsub.subscriber. Having obtained your keyfile.json, we will create another environmental variable to pass the creadentials to our Heroku app:
g_cred_path=/path/to/keyfile.json
heroku config:set GOOGLE_APPLICATION_CREDENTIALS="$(< $g_cred_path)"
# Output similar to:
Setting GOOGLE_APPLICATION_CREDENTIALS and restarting ⬢ unique-name-of-your-app... done, v10
GOOGLE_APPLICATION_CREDENTIALS: {
  "type": "service_account",
  "project_id": "awesome-project",
  "private_key_id": "XXXXXXXXXXXXXXXXXXXXXXXXXXXXXXXXX",
  "private_key": "-----BEGIN PRIVATE KEY-----\nXXXXXXXXXXXXXXXXXXXXXXX\n-----END PRIVATE KEY-----\n",
  "client_email": "pub-sub-subscriber@awesome-project.iam.gserviceaccount.com",
  "client_id": "XXXXXXXXXXXXXXXXXXX",
  "auth_uri": "https://accounts.google.com/o/oauth2/auth",
  "token_uri": "https://oauth2.googleapis.com/token",
  "auth_provider_x509_cert_url": "https://www.googleapis.com/oauth2/v1/certs",
  "client_x509_cert_url": "https://www.googleapis.com/robot/v1/metadata/x509/pub-sub-subscriber%40awesome-project.iam.gserviceaccount.com"
}
We can now deploy the app. Provided that you do not have any uncommitted changes:
git push heroku master
# Output similar to:
Counting objects: X, done.
Delta compression using up to 4 threads.
Compressing objects: 100% (X/X), done.
Writing objects: 100% (X/X), XXX bytes | 0 bytes/s, done.
Total X (delta X), reused 0 (delta 0)
remote: Compressing source files... done.
remote: Building source:
remote:
remote: -----> Python app detected
remote: -----> Installing dependencies with Pipenv 2018.5.18…
remote:        Installing dependencies from Pipfile.lock (3416cd)…
remote: -----> Discovering process types
remote:        Procfile declares types -> web, worker
remote:
remote: -----> Compressing...
remote:        Done: 79.5M
remote: -----> Launching...
remote:        Released v17
remote:        https://unique-name-of-your-app.herokuapp.com/ deployed to Heroku
remote:
remote: Verifying deploy... done.
To https://git.heroku.com/unique-name-of-your-app.git
   xxx06c8..xxx0207  master -> master
The last step is to start the worker dyno:
heroku ps:scale worker=1
# Output similar to:
Scaling dynos... done, now running worker at 1:Free
You may also check that your 2 dynos are running and your free-quota:
heroku ps
# Output similar to:
Free dyno hours quota remaining this month: 315h 39m (33%)
Free dyno usage for this app: 2h 20m (0%)
For more information on dyno sleeping and how to upgrade, see:
https://devcenter.heroku.com/articles/dyno-sleeping

=== web (Free): flask deploy; gunicorn gcpubsub:app (1)
web.1: up 2018/12/06 17:28:20 +0200 (~ 3m ago)

=== worker (Free): rq worker -u $REDIS_URL gcpubsub-tasks (1)
worker.1: up 2018/12/06 17:28:11 +0200 (~ 3m ago)
Assuming everything has gone well, your app will be available at https://unique-name-of-your-app.herokuapp.com/. Client interface and usage are the same as for the local deployment.
Asynchronous tasks
Asynchronous tasks run independently of the main application on a worker process. Communication between application and workers is happening with a task queue. The task queue we are using for this project is RQ (Redis Queue), but others exist for python including the popular Celery. As we saw in local deployment, the worker is started separately (rq worker gcpubsub-tasks) waiting for tasks from the application. RQ is initialized together with Redis (we need a message broker for the task queue), in the application factory create_app, so the task queue can be easily accessed through out the flask app (snippet from app/__init__.py):
| |
A new listening task is started, unless another one is already running, when the user on the client-side interface clicks on the button Start polling. This sends a GET request on the server-side /polling_pubsub endpoint. The same endpoint terminates a running task, when it receives a POST request. The response from the endpoint is a JSON object (app/admin/routes.py):
| |
The task polling_subscription (in app/tasks.py) is continuously polling a Pull-subscription from a Google Cloud Pub/Sub subscription. I have used a Cloud Build subscription but the same principles apply to other GCP Pub/Sub subscriptions. The function can use two flavors of GOOGLE_APPLICATION_CREDENTIALS input, a keyfile.json or an environmental variable containing the contents of a keyfile.json in a string. Then a subscription object is created for the topic we want to subscribe to.
| |
The task will continue to renew itself as long as the user has not clicked on Stop polling button. A notification will be created when the task runs, to be used by the client-side for the task status display (app/tasks.py). In each cycle the code checks if the user has requested termination of the task and proceeds accordingly. When a new message is received, a callback processes the received message and updates the database.
| |
Server Side
Apart from the endpoint handling asynchronous tasks, server-side provides a route, /useritems returning new user messages as rendered html in a JSON object (app/admin/routes.py):
| |
The route /notifications provides data for client-side notifications concerning the status of current tasks (app/admin/routes.py).
| |
The endpoint /pygments.css returns the styling for the JSON on the client-side when it receives a GET request (app/admin/routes.py).
| |
The rest of the routes provide a landing page with authentication form (/index), an authenticated user page (/user/<username>), a password-change and a log out endpoints. Most of the endpoints are accessed with AJAX requests from the client-side.
Client Side
The hart of the client-side functionality is the javascript app/static/main.js. As soon as the user is logged in, we start checking for notifications about the status of asynchronous tasks and for new user-items (messages) at 5 sec intervals. Two AJAX requests at the relevant server endpoints are made. The first is to handle the behavior of user-alert messages, while the second appends the html <table> with the incoming messages:
| |
User alerts are displayed without page refresh using javascript and JQuery. There are two alerts, informing the user of the current task-status and the requested action (button click) progress. The behavior is handled with the set_task_progress function that fiddles with the page’s html depending on the notifications (green box):
| |
While the second alert (blue box), informs the user of the start and termination of the asynchronous task depending on the user’s actions (button click).
| |
Fade-in and fade-out transitions have been used to ease out the on/off alerts state for the eye. The blue-box alert will be displayed for 7 sec, set with a setTimeout. The click function also changes the text of the button from the default Start polling to Stop polling and back.
The client view after a user click’s on Start polling button:
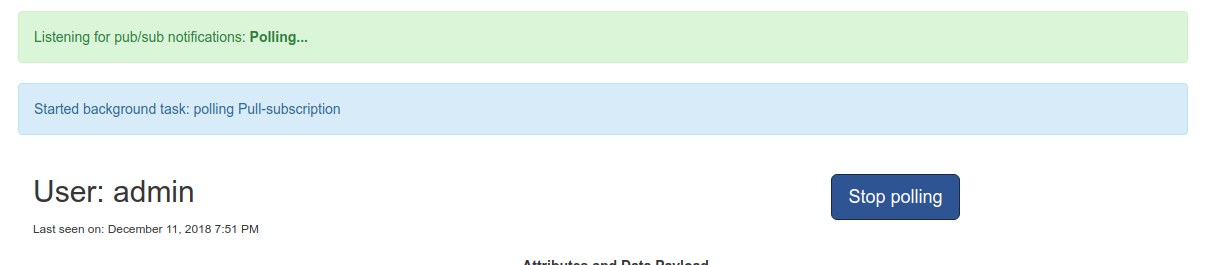
User alerts after click on 'Start polling'
A simple change password form is also included in user view. The form allows the user to change its password when logged in. When the button Change is clicked the two password fields are compared to verify the password is entered correctly and an AJAX POST request is made to the server-side /change_password endpoint. An alert is shown to the user with the request’s result. The form is reset after submit.
| |
TL;DR
A simple Flask application that can asynchronously listen for new messages on a Cloud Pub/Sub Subscription using the Python Google Cloud client libraries. A task queue (RQ) is used to handle the asynchronous polling tasks and processing of the received messages. Server-side provides a number of endpoints to feed data to client-side, start/stop polling tasks and authenticate users. Client-side provides an interactive user interface, with asynchronous AJAX request promoting usability and enabling monitoring of Cloud APIs and processes in your Cloud projects.
Enjoy coding!
References
- Example flask application from Miguel Grinberg.